This article contains all the contents of YI IoT, multiple ways to add, settings of YI IoT camera functions, how to use the computer, and will be continuously updated.
Before you start you need to download YI IoT APP and register your account.
Applicable to: Cameras with YI IoT APP or any other brand cameras using YI IoT. YI IoT Light bulb camera is also applicable to this guide
YI IoT and YI Home are different apps, if you are looking for a guide to YI Home, check out: How To SetUp YI Home or Kami Camera
Due to the update of yi iot, some of the interfaces of this guide will be different and will be updated in the future.
YI IoT APP download
YI IoT supports Android and iPhone, you can download it from google play or app store.
Register your account and login
YI IoT only supports email registration, or you can sign in with Facebook.

Connect YI IOT Camera
Connect power
Before add YI IoT camera, please connect YI IoT camera to the power supply first.
After the device is successfully started, wait for about 20s, and you can start scanning when you hear a beeping sound.
Add camera
There are 3 ways to add a YI IoT camera, we recommend using ‘WiFi connection’ to add a YI IoT camera.
Click the ‘+’ icon, then click ‘Scan code binbing’, scan the QR code on YI IoT camera, the APP will show the recommended way to add.
Follow the instructions on the APP to add a YI IoT camera.

Can’t find the QR code on the YI IoT camera? You don’t need to scan the QR code, you can add the camera manually.
Add camera: WiFi connection

1. Select WiFi connection, make sure YI IoT camera is beeping, click ‘l heard the beep‘ > Next.
Note: Only when YI IoT camera beeps ‘drop-drop’, you can add YI IoT camera, no beep please reset YI IoT camera.

2. Enter your WiFi password, then click next.
If the app does not show your wifi, please make sure your phone is connected to wifi.

3. The app shows the QR code to YI IoT camera to scan, phone is 4-8 inches away from the camera, camera will issue a voice prompt for a successful scan.
After the camera issued voice prompts click “I heard Waiting to connect“, then enter the next step

You can turn on ‘try sonic binding’, to improve the connection success rate.

4. Wait for YI IoT camera to connect to wifi, set the camera name after successful connection.
The new YI IoT camera comes with free cloud storage, or click ‘<‘ to cancel.

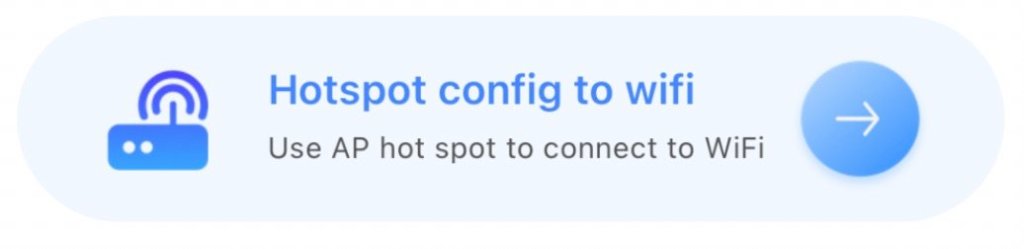
Add camera: Hotspot config to wifi
1. Select ‘Hotspot config to wifi‘,make sure YI IoT camera is beeping, click ‘l heard the beep‘ > Next.
Note: Only when YI IoT camera beeps ‘drop-drop’, you can add the camera, no beep please reset the camera.

2. Enter your wifi password, then connect the phone WiFi to the network with”CAM_ “the default password is: 12345678 and return to the APP

3.Back to YI IoT APP, wait for YI IoT camera to connect to wifi, set the camera name after successful connection.

How to use YI IoT Camera without Internet?
If you don’t have wifi, or use YI IoT camera without internet, you can use Hotspot direct connect.
But you can’t watch YI IoT camera remotely, you can’t receive alarm notifications, you can only use the simplest functions.
1. Select Hotspot direct connect, then connect the phone WiFi to the network with”CAM_ “the default password is: 12345678 and return to the APP

2. Go back to the app, click on to connect, and now you can use the camera.
Note: This mode can only be used if you connect to the camera’s hotspot wifi.

YI IoT Important Function Settings
Sharing the camera allows multiple phones to use the camera.
1. Click on the share icon > Share cameras with your family,You can choose QR Code or YI loT account to share.
Note: The other party needs to have a YI IoT account to add a camera.

1. Select QR Code, Select the permissions available to share, and then tap Share.

2. Ask invitee to open the app and press the account icon in the lower right corner of the page.
Press the QR Code icon in the upper right corner and have your friend scan.

1. Select YI IoT account, select shareable permissions, enter the invitee’s YI IoT email address, and click Share.
2. YI IoT APP will send a notification to your invitee. Your invitee needs to confirm invitation in the App.

Recording Settings
The camera will only be displayed when the SD card is inserted SD card recording settings, inserting the SD card will, the camera will restart.
By default, the camera is activated with Event recordi, after activating motion detection, the camera will automatically record when it detects motion.
You can set the recording mode in SD card recording.
All time recording: The camera will record all the time and will not stop.
Event recording: Only record when an alarm event is detected
All-day Recording: 24-hour operation
Custom: You can set the time to start recording, (up to 3)

View Camera Recording
Click on the Activity to enter the interface, ‘![]() ‘ is the cloud storage video, ‘
‘ is the cloud storage video, ‘![]() ‘ is the SD card video.
‘ is the SD card video.
The blue time indicates the time when there is video recording.

Motion Detection Settings
After turning on motion detection, the camera detects motion and the app will push an alarm notification.
The motion detection recording is set in the SD card recording.
You can set the detection sensitivity and notification frequency in Smart Detection, and you can also activate the alarm sound.
Motion Detection: Motion detection switch
Sensitivity Level – High:The camera will generate an alert and video when detecting the object slightly shaking.
Sensitivity Level – Medium:The camera will generate an alert and video when detecting the object moving at an moderate.
Sensitivity Level – LOW:The camera will generate an alert and video when detecting the object moving significantly.
Alert Frequency: Low – 10 minute,Medium – 5 minute, High – 1 minute
Schedule: Set alarm notification working time
Camera alarm sound: When activated, the camera will sound an alarm when it detects motion.

Motion tracking Settings
Motion tracking is activated in Camera Settings.
Motion tracking allows you to track moving objects, and the camera will follow the movement of the object.
YI IoT Light bulb camera Setup
YI IoT Light bulb camera has the same function as a normal camera, the main feature is that it can be mounted on a light stand.
If your YI IoT camera supports Light, you can see the ‘![]() ‘ icon in the live screen. By clicking the ‘
‘ icon in the live screen. By clicking the ‘![]() ‘ icon, you can select the Light working mode.
‘ icon, you can select the Light working mode.
Auto: When in night vision mode, the camera detects the movement of objects, the camera will start Light.
Manual switch: You can choose Open or Close to switch the Light manually.

YI IoT APP Interface Description
1. Watch 4 cameras at the same time 2. Add cameras
3. switch camera display 4. Share cameras
5. Cloud storage 6. Camera settings 7. alarm information
8. alarm information 9. cloud storage
10. personal information 11.Cloud Storage
12. Flip video screen 13. camera settings
14. save the video on the phone 15. voice intercom
16. sound switch 17. Screenshot
18. Full screen zoom 19. alarm message
20. view camera video 22. Control camera movement

Video Tutorials
YI IoT For PC
YI IoT supports Windows computers, and you can download the software here.
How To Add YI IoT Camera To Your Computer?
If you have added a camera to the YI IoT APP, you can use the camera on your computer by simply logging into your account.
1. Login to software, no account please register first.

2. Click ‘+’ , make sure your camera is beeping, click ‘I heard “Waiting to connect”‘.
Note: Only when the camera beeps ‘drop-drop’, you can add the camera, no beep please reset the camera.

3. Enter your wifi name and password, then click Please choose Wi-Fi
Note: The name and password are case-sensitive

4. Let the camera scan the QR code, If you hear “QR Code scan is successful”, please click Next.

5. Wait for the camera to connect to the wifi, click Save after successful connection.


7. Double-click the camera to watch the video.

YI IoT For PC Interface Description
- Enlarge the video
- alarm message
- camera settings
- downloaded cloud storage video
- BUG FEEDBACK
- set save folder
- add camera
- camera
- cloud storage video
- memory card video
- camera switch
- Pause video
- control camera movement
- switch resolution
- Sound switch
- full-screen viewing

Why add YI IoT camera failed?
Please check the following issues, then reset the camera and add it again.
- Ensure camera is powered up and waiting for networking;
- Ensure camera has successfully identified the QR code and heard “QR code scanned successfully”,
- Ensure Wi-Fi name and password are correct;
- Try to restart the router or modem and make sure the camera is as close to the router as possible;
- Check if Wi-Fi is 2.4G (some cameras support 5G)
I heard “wifi connection failed” or “wifi password error”
Weak WiFi signal, please move device or cell phone closer to WiFi router, or try rebooting WiFi router.
Make sure the wifi password is correct
I heard “Pairing has timed out”
Reset the camera and then re-add it.
What to do if I did not hear “QR Code scan is successful”?
- The plastic cover on the new camera has to be removed and make sure that the lens on an old camera is clean.
- The QR code cannot be read if the display resolution of your mobile phone is too low, too dark or it is too far from the camera lens.
- please reset your camera.
How to reset YI IoT camera?
The camera can be reset only after the camera is started, Press and hold the reset button for 5 seconds.
Can YI IoT Camera connect to YI Home or Kami Home APP?
No, YI IoT can only connect to YI IoT camera.
Why some YI IoT camera features I don’t have?
- YI IoT camera and APP will be updated all the time, you may be using the old version.
- Different models of YI IoT camera may have some differences
- It is recommended to contact your camera seller
YI IOT CAMERA FAQ
Update history
- 23/03/06 Updated Light function description
- 23/02/24 Added FAQ


